
AI Restoration and Upscaling for Photographers
Recover detail from archive scans, rescue frames that were nearly right, and print larger than the sensor should allow — without giving up control of the file.

Photographers are the most sceptical audience for this software, and correctly so. The failure mode of AI enhancement is invention: a model that does not recover detail so much as decide what detail should have been there, smoothing skin, straightening teeth, and turning a specific face into a generic one. For anyone whose work depends on the frame being true, that is disqualifying.
So the useful framing is narrow. These tools are good at a handful of jobs where the alternative is losing the image entirely, and they are bad — or at least not worth the risk — at everything else.
How it works
-
1
Scan or upload at maximum quality
Every subsequent step multiplies what is in the file. A 1200 DPI scan of a negative gives the restoration model real grain to work with; a phone photograph of a print gives it a photograph of a print.
-
2
Restore, then upscale
In that order. Restoration works on damage — tears, fading, colour shift, mould. Upscaling then works on a clean source rather than enlarging the damage along with everything else.
-
3
Review at 100%
The failure cases are almost always in faces, text and repeating fine texture. Anything you intend to print or deliver should be checked at full size before it leaves your machine.
Where it genuinely earns its place
Archive and family restoration
Faded, torn, water-damaged prints where the alternative is a scan that nobody wants to look at. This is the strongest case by a wide margin — the original is already lost, and recovery is pure gain.
Colour negative recovery
Decades-old C-41 shifts hard towards magenta and cyan. Automated colour restoration gets far closer, far faster, than curve-pulling channel by channel.
Printing beyond the sensor
A 24MP frame at 300 DPI prints comfortably to A2. Past that, upscaling buys you a size class — useful for exhibition prints from older bodies.
Salvaging the only frame
The shot that mattered and was slightly soft, from an event that will not happen again. Sharpening will not make it a keeper, but it can make it usable.
Black and white colourisation
For historical and family work, where the point is engagement rather than documentary accuracy. Always keep and label the monochrome original.
Legacy digital files
Early digital work sits at 3 or 6 megapixels and looks it. Upscaling makes a 2004 archive usable on a modern display or in a book.
How to use this without wrecking your files
- Never overwrite the original. Keep the untouched scan or RAW as the master and treat every enhanced version as a derivative.
- Restore before upscaling, and upscale before any creative grading. Reversing that order bakes your look into the input the model reasons about.
- Watch faces at 100%. Models trained on modern portraiture tend to smooth pores and regularise features — on a portrait of someone identifiable, that is a real loss.
- Watch text and numbers. Signage, licence plates and handwriting are where upscalers hallucinate most confidently, and a plausible wrong character is worse than a blur.
- Do not upscale to fake resolution you will be asked to prove. Deliver at the size the file honestly supports if a client is paying for a specific spec.
- For anything documentary or archival, note what was done. A restored image with an undisclosed history is a provenance problem for whoever inherits it.
All tools
 HOT
HOT
Image Enhancer
Instantly improve image quality.
1 credits · Free 4K
4K
Image Upscaler
Upscale images up to 4K resolution.
1 credits · Free
Image Sharpener
Fix blurry and out-of-focus photos.
1 credits · Free
Text Clarifier
Make blurry text in photos and scans readable.
7 credits · Free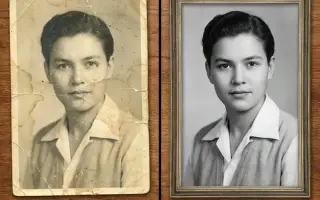
Photo Restore
Repair tears, creases, stains and fading in old photos.
2 credits · Free
AI Face Enhancer
Sharpen and restore faces in blurry or low-resolution photos.
1 credits · Free
AI Anime Enhancer
Enhance and upscale anime images.
1 credits · Free HOT
HOT
Background Remover
Remove backgrounds automatically.
1 credits · FreeThe line worth holding
Everything here is a recovery tool. It is at its best when the alternative is an unusable file, and at its most dangerous when it is used to make a good file look like a better one — because that is where invention creeps in unnoticed and ends up in a print.
If you keep the original, review at 100%, and stay clear about which images have been reconstructed and which were captured, none of this compromises the work. Skip those three and it quietly will.
Frequently asked questions
Does upscaling invent detail?
It reconstructs it, which for fine texture — fabric weave, foliage, hair — is close enough to be indistinguishable and genuinely useful. For anything semantic, particularly faces and text, it is making a statistical guess. Treat the first as recovery and the second as something to verify.
How much can I enlarge before it stops being honest?
Two times is safe for almost any subject. Four times holds up in print for landscape and architectural work with fine texture. Beyond that you are looking at a rendering informed by your photograph rather than an enlargement of it.
Will this replace my retouching workflow?
No. It has no concept of intent — it cannot dodge to direct the eye, or decide that a blemish is character rather than a flaw. It is a restoration and resolution tool that sits before your normal process, not in place of it.
What about client work and disclosure?
Depends entirely on the commission. Commercial and editorial retouching has always included substantial correction. Documentary, photojournalism and competition work usually have explicit rules about generative alteration — read them before submitting, because the sanction is typically disqualification.
Does it handle RAW files?
Convert to a high-quality TIFF or PNG first, at full bit depth if your workflow supports it. Processing a compressed JPEG export throws away the latitude the restoration would otherwise have used.