Creating videos used to take hours—sometimes even days. You had to write a script, record clips, adjust timing, pick music, and hope everything looked good in the end. But today’s creators don’t have to work that hard.
Thanks to AI-powered tools like CapCut AI Video Maker, you can automate around 80% of the process in minutes. Whether you’re a beginner, busy professional, influencer, or marketer, CapCut makes video creation smooth, quick, and surprisingly fun.
CapCut’s AI Video Maker takes your ideas—from short scripts to big concepts—and transforms them into polished, professional-looking videos.
You can generate scripts, scenes, captions, voiceovers, and even add music, all with just a few clicks. The best part? You don’t need advanced editing skills. CapCut does most of the heavy lifting automatically.
Why Use CapCut AI Video Maker?
Before we jump into the steps, here’s why creators love it:
- Fast results: Create ready-to-publish videos in minutes.
- AI-powered scriptwriting: No need to brainstorm every line.
- Smart automation: Voiceovers, captions, and transitions are auto-generated.
- Professional quality: Clean visuals, synced audio, smooth pacing.
- Beginner-friendly: No editing experience required.
- Versatile: Perfect for social media videos, ads, tutorials, explainers, and personal projects.
Now, let’s dive into the simple method to automate your video creation using CapCut’s AI tools.
How to Automate Video Creation Using CapCut AI Video Maker
CapCut Desktop Video Editor offers beginner-friendly, free tools. Let’s explore how to automate video creation using CapCut AI Video Maker.
Step 1: Start the AI Video Maker
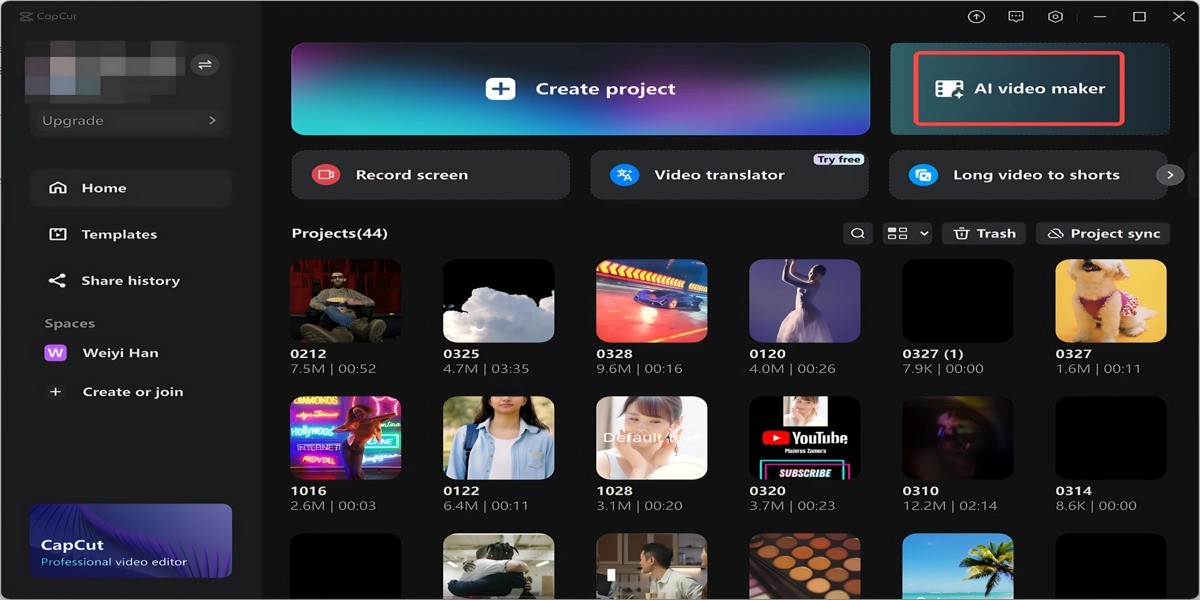
Open CapCut Desktop, and from the main interface, choose “AI video maker.” This opens the dedicated AI workspace where automation tools live. Next, click “New project.”
This is your starting point—CapCut will guide you step by step through script generation, scene creation, and voiceovers.
Once inside the workspace, you’ll see various tabs like Script, Scenes, Captions, and Music. These tabs make it easy to move smoothly through the creation process.
Step 2: Generate a Script and Create a Video
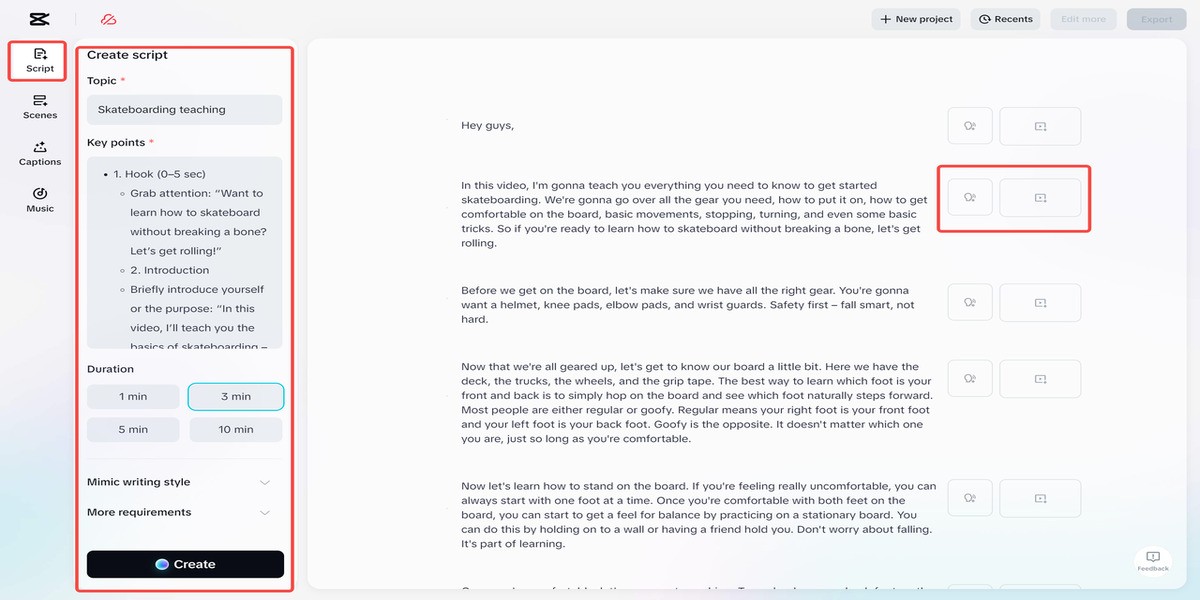
Start by going to the “Script” tab. Here, enter:
- Your video topic
- Key details or facts
- Any scene ideas
- Style (fun, professional, educational, emotional, etc.)
- Extra instructions (tone, length, perspective)
CapCut’s AI Script Creator is incredibly flexible. Whether you’re creating a travel vlog or a product promo, the tool adapts quickly. It also adapts if you are creating a learning video or a short storytelling clip. The tool instantly matches your theme. After entering your information, click “Create.”
CapCut will produce a polished script based on your inputs. If you like the script, click “Use” to turn that script into an auto-generated video with AI-selected visuals and timing.
Within seconds, CapCut converts your script into a full video draft—finished with structured scenes. This saves a massive amount of time compared to traditional editing.
Step 3: Add a Voiceover
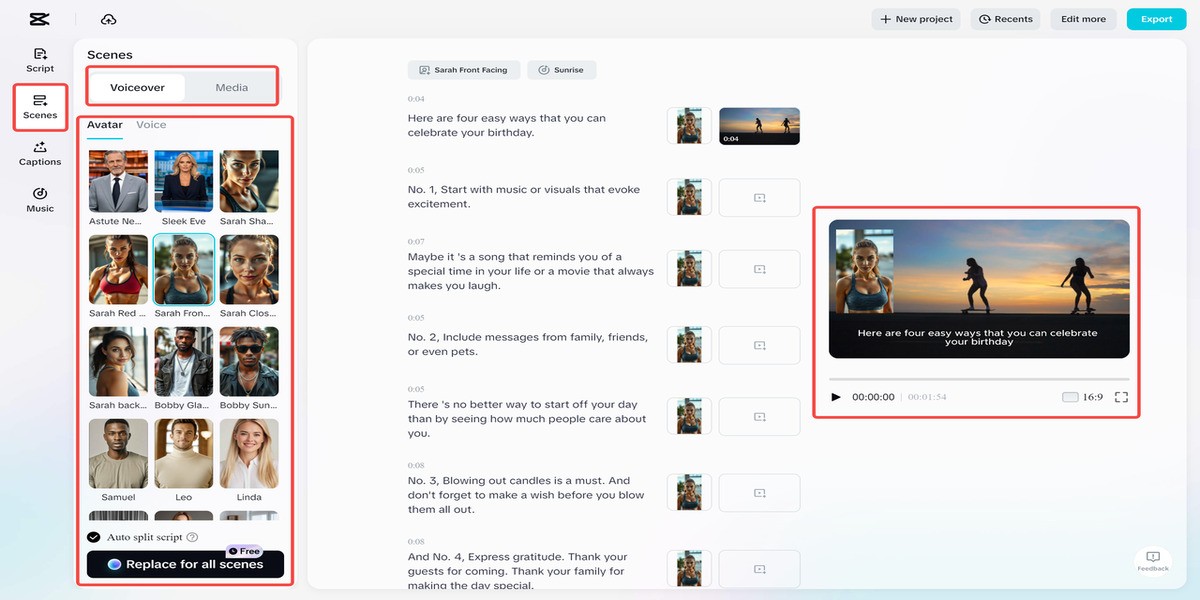
To bring your video to life, head over to the “Scenes” tab and select “Voiceover.” Here you can:
- Choose from diverse AI voices
- Pick accents, tones, and moods
- Adjust speed and pitch
- Add narration automatically to match each scene
You can also upload your own media—photos, clips, brand assets—to make your video feel more personal.
Additionally, CapCut lets you create an AI avatar to narrate your content with a visual presenter. This is especially useful for faceless creators, online educators, and social media influencers who want consistent branding.
Enhance Your Video With Extra AI Features
Step 4: Add Captions Automatically
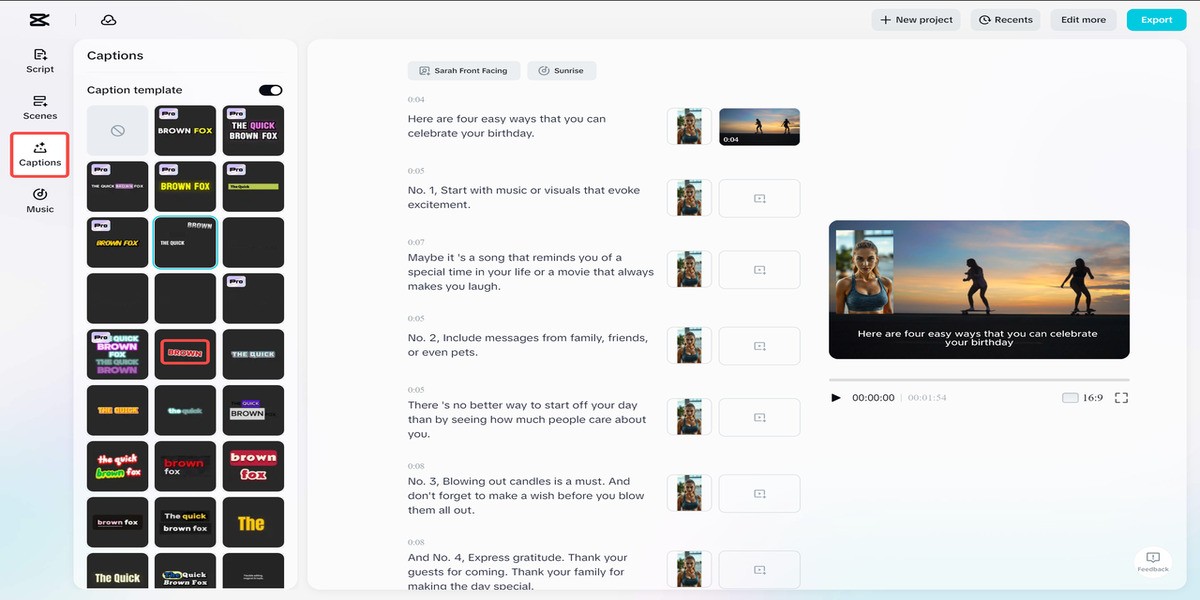
Go to the “Captions” tab. Browse the text templates and choose one that fits your video’s style—minimal, bold, animated, or colorful. CapCut will:
- Auto-generate captions
- Sync them perfectly with your voiceover
- Allow easy customization of fonts, colors, and animations
Captions improve accessibility and help your content execute better on social platforms where viewers watch without sound. Try CapCut’s amazing Nano Banana Pro feature to make your video more engaging.
Step 5: Add Background Music
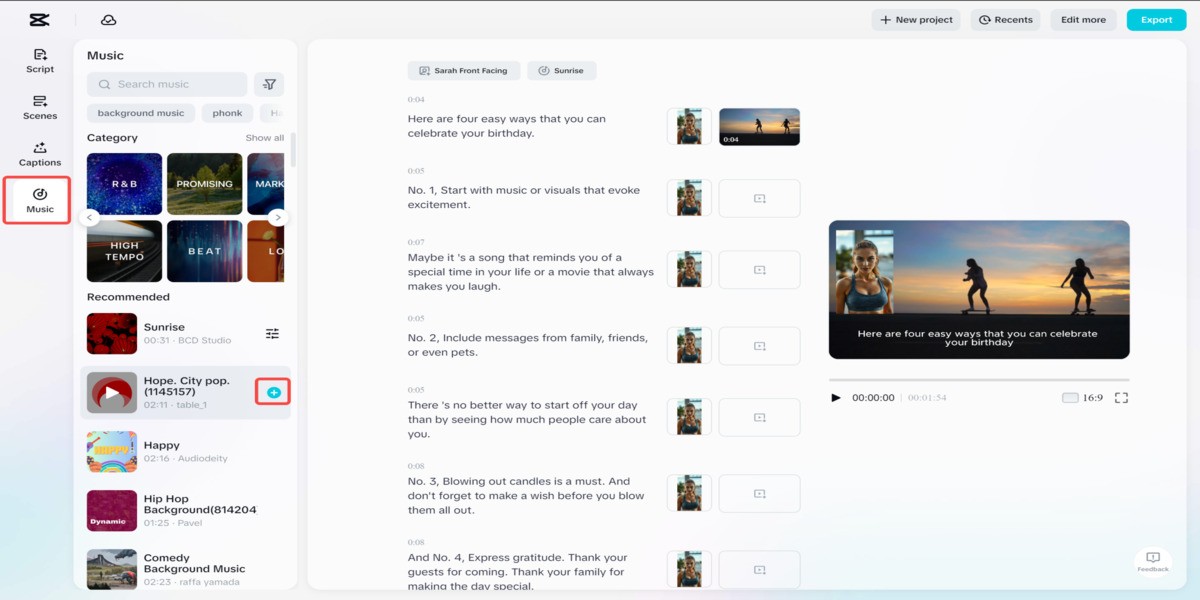
Next, visit the “Music” tab. Here you’ll find a wide range of curated tracks based on mood, genre, theme, platform (TikTok, YouTube, Reels, etc.) Pick a soundtrack that enhances the emotional tone of your video.
Add it with one click—CapCut automatically adjusts the music volume to complement your narration.
Step 6: Export Your Video
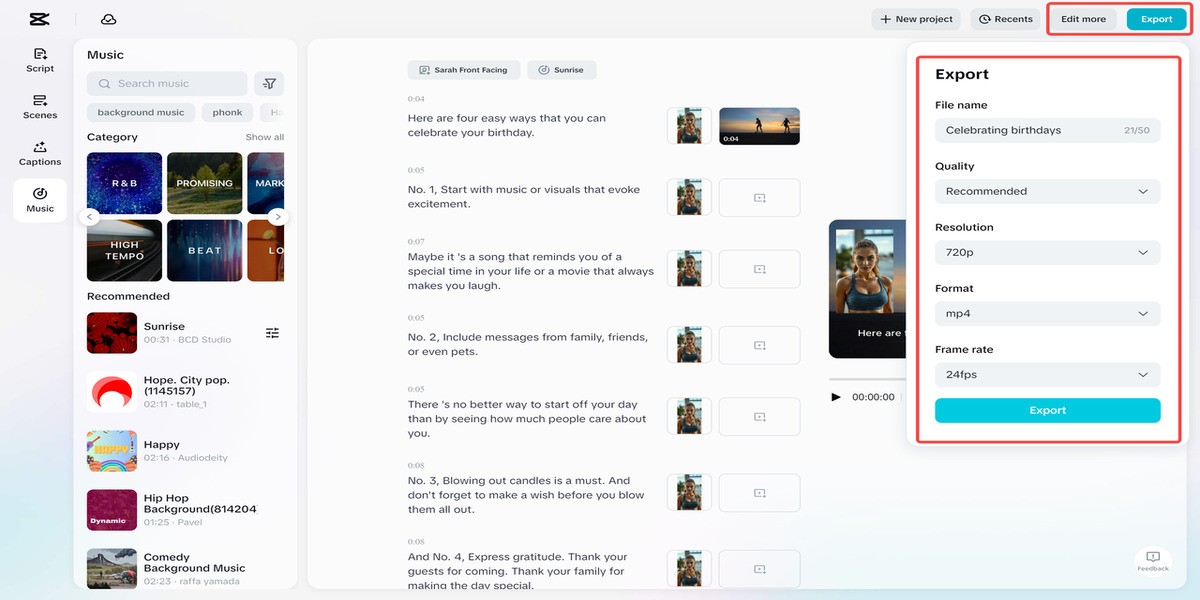
Once your video looks the way you want, click the “Export” button in the top-right corner. Set up the settings:
- Resolution: 1080p, 2K, or 4K
- Format: MP4, MOV, etc.
- Frame rate: 24, 30, or 60 FPS
- Quality: Standard or high-quality
Then export the completed video to your device. Your AI-generated project is now ready to upload to TikTok, YouTube, Instagram, Facebook, or your website.
Conclusion
CapCut AI Video Maker is transforming how creators create content. What once required deep editing skills and long hours now takes just a few guided steps.
From scriptwriting to scene design, voiceovers, captions, and music—CapCut automates almost everything while still giving you creative control.
If you want to save time and keep your content fresh, use the AI Video Maker. It helps you produce consistently professional videos. It is the perfect tool to add to your workflow.